

I like my eggnog thick.
It’s honestly the main feature I’m looking for in an eggnog. Mediocre flavor I can excuse, but if it doesn’t have that thick, creamy texture a glass of milk could never achieve, what is the point of anything?
So I was disappointed when I followed a recipe to make eggnog myself for the first time and found that… it was thin. It was lacking. It may as well have been water. I swore off making eggnog and stuck to buying my brand of choice, Southern Comfort.
But one day last year, I was feeling a little experimental. If cooking the egg and milk mixture to 160 degrees F as the recipe instructed didn’t thicken it to my liking, why not just… cook it for longer?
I discarded the thermometer and cooked it for a few minutes longer until it seemed like it had thickened some. And the result, after it had cooled and I’d beaten in the whipped egg whites, was something magical. It had the thickness of a milkshake, and yet the beaten egg whites added a frothy lightness that kept the mixture from being too heavy. It was perfect. Except… I had no idea what temperature I’d cooked the eggnog mixture to.
And so my experiment began.
I bought a digital thermometer so I could track temperature changes more easily than with my bulky candy thermometer, and then I set about making six versions of eggnog, each cooked to a different temperature.
Choose your fighter.
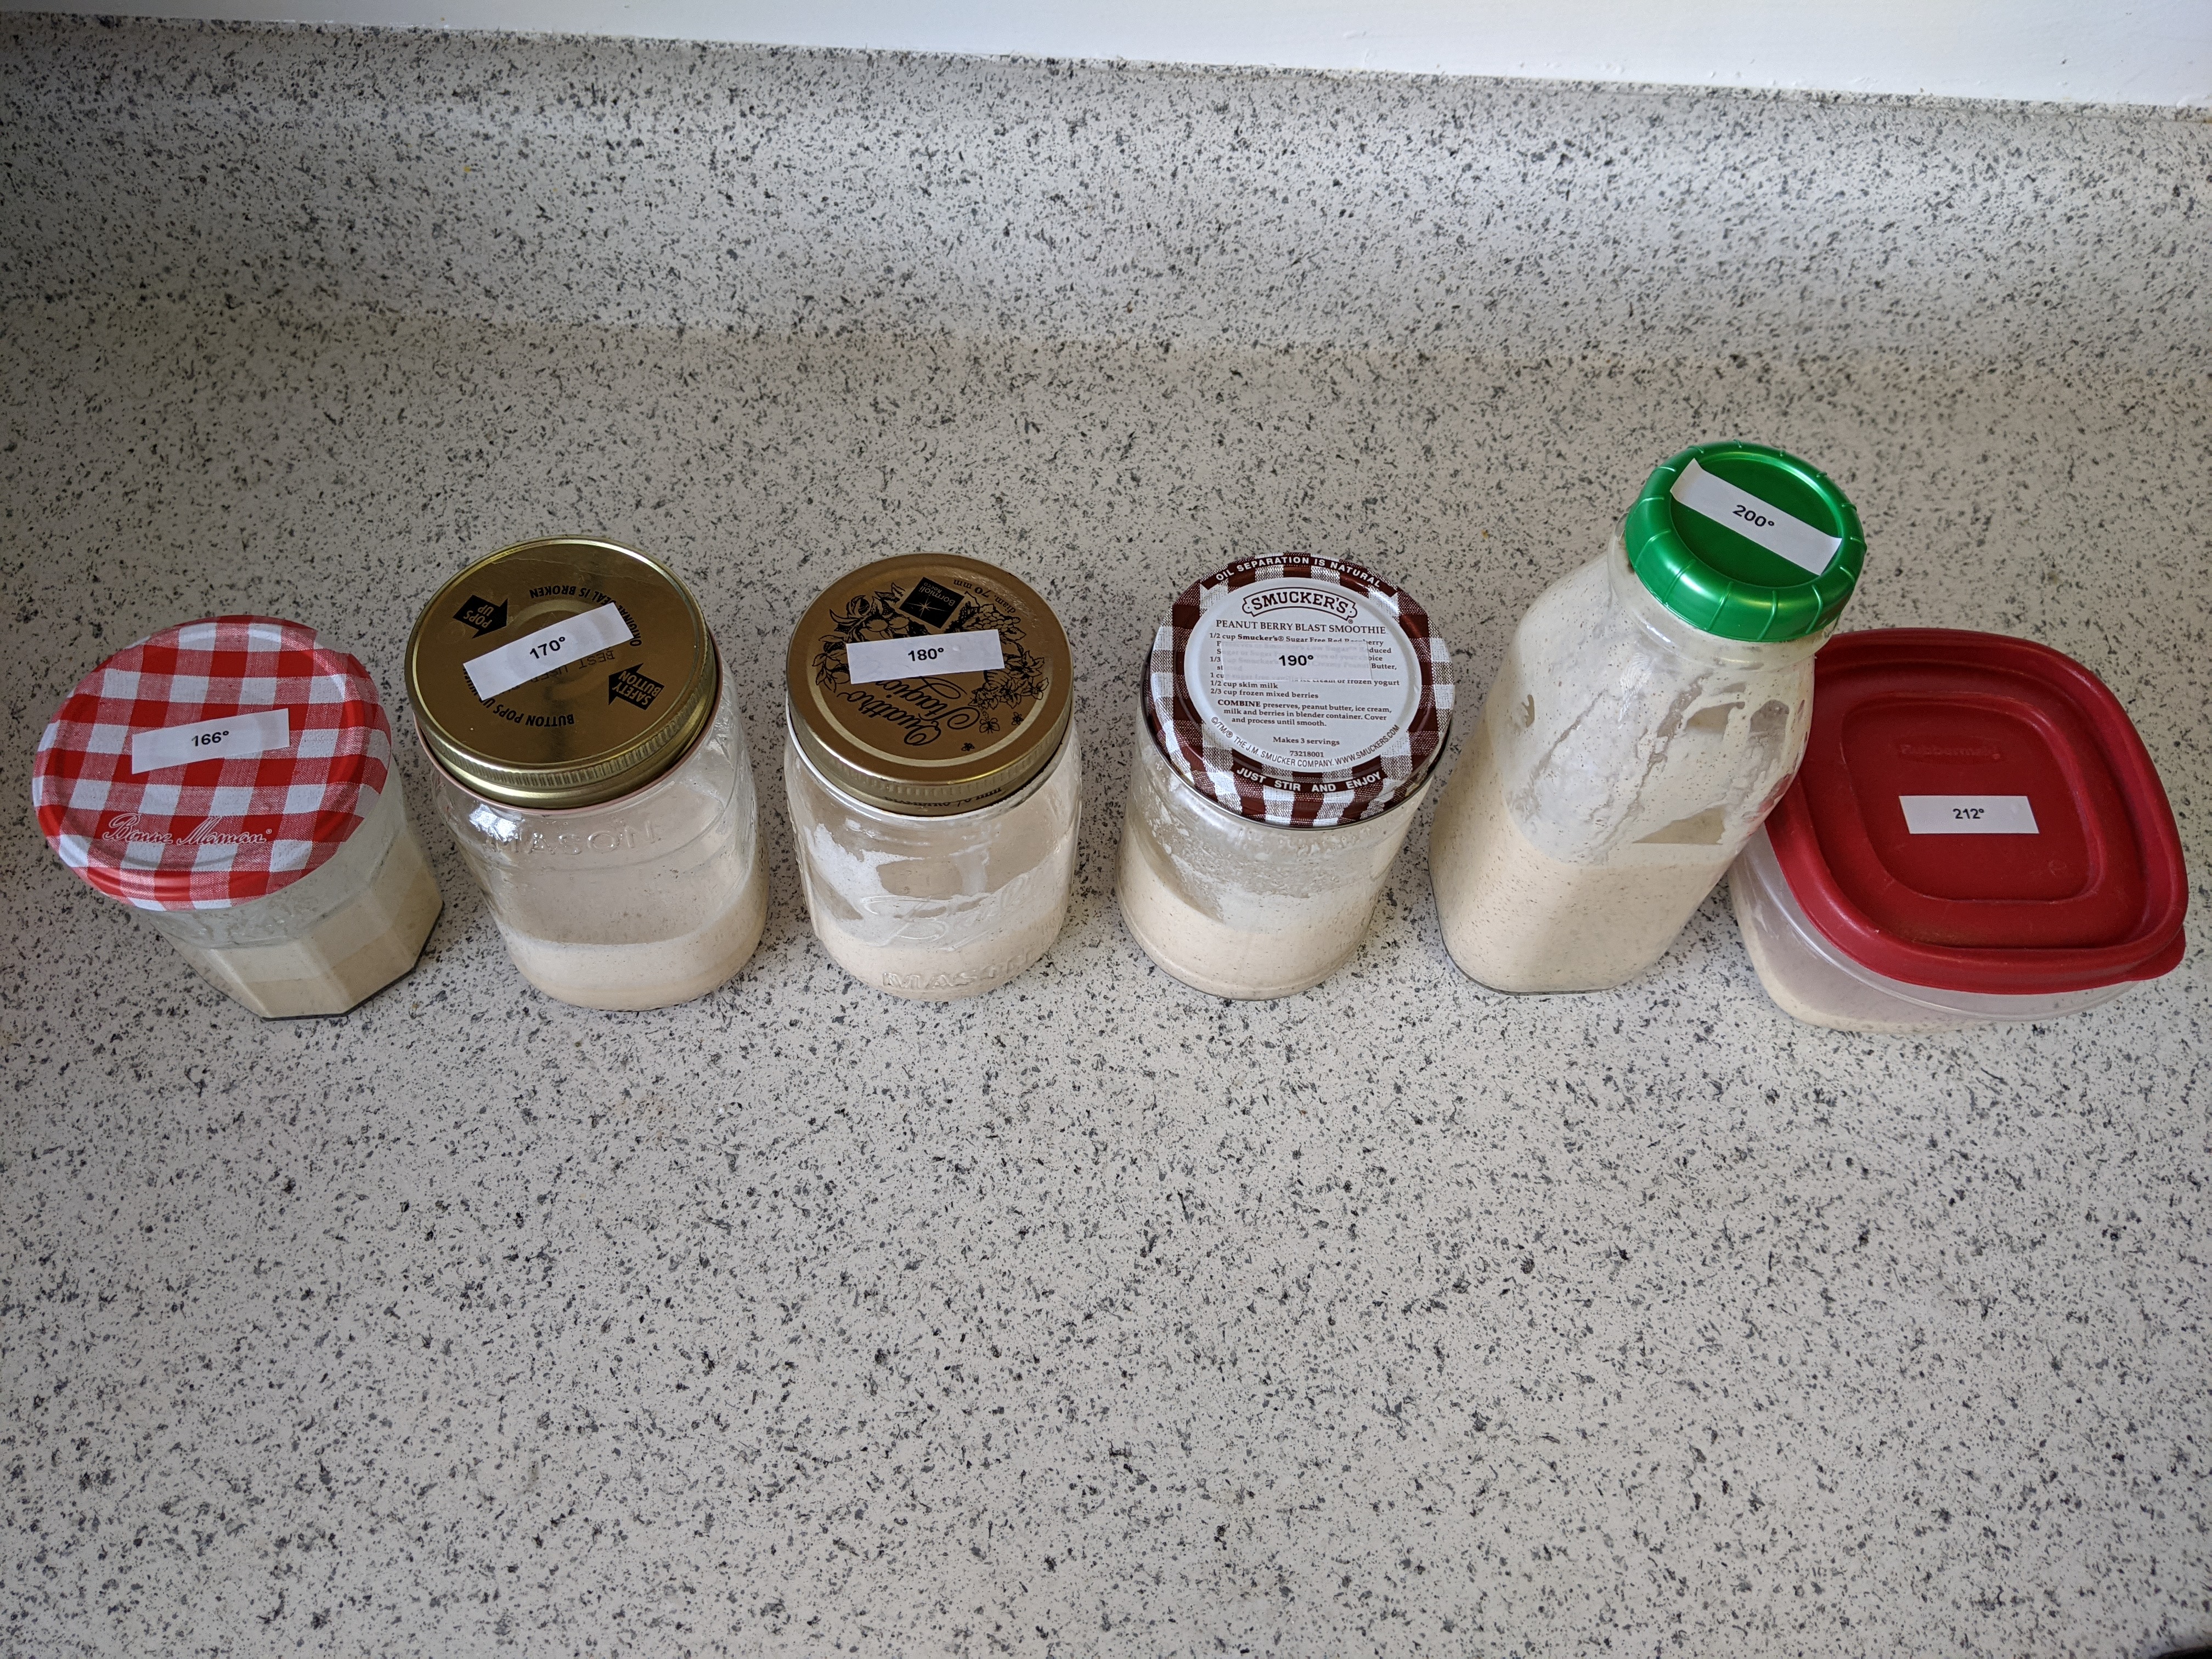
The six versions, pictured above from left to right, are:
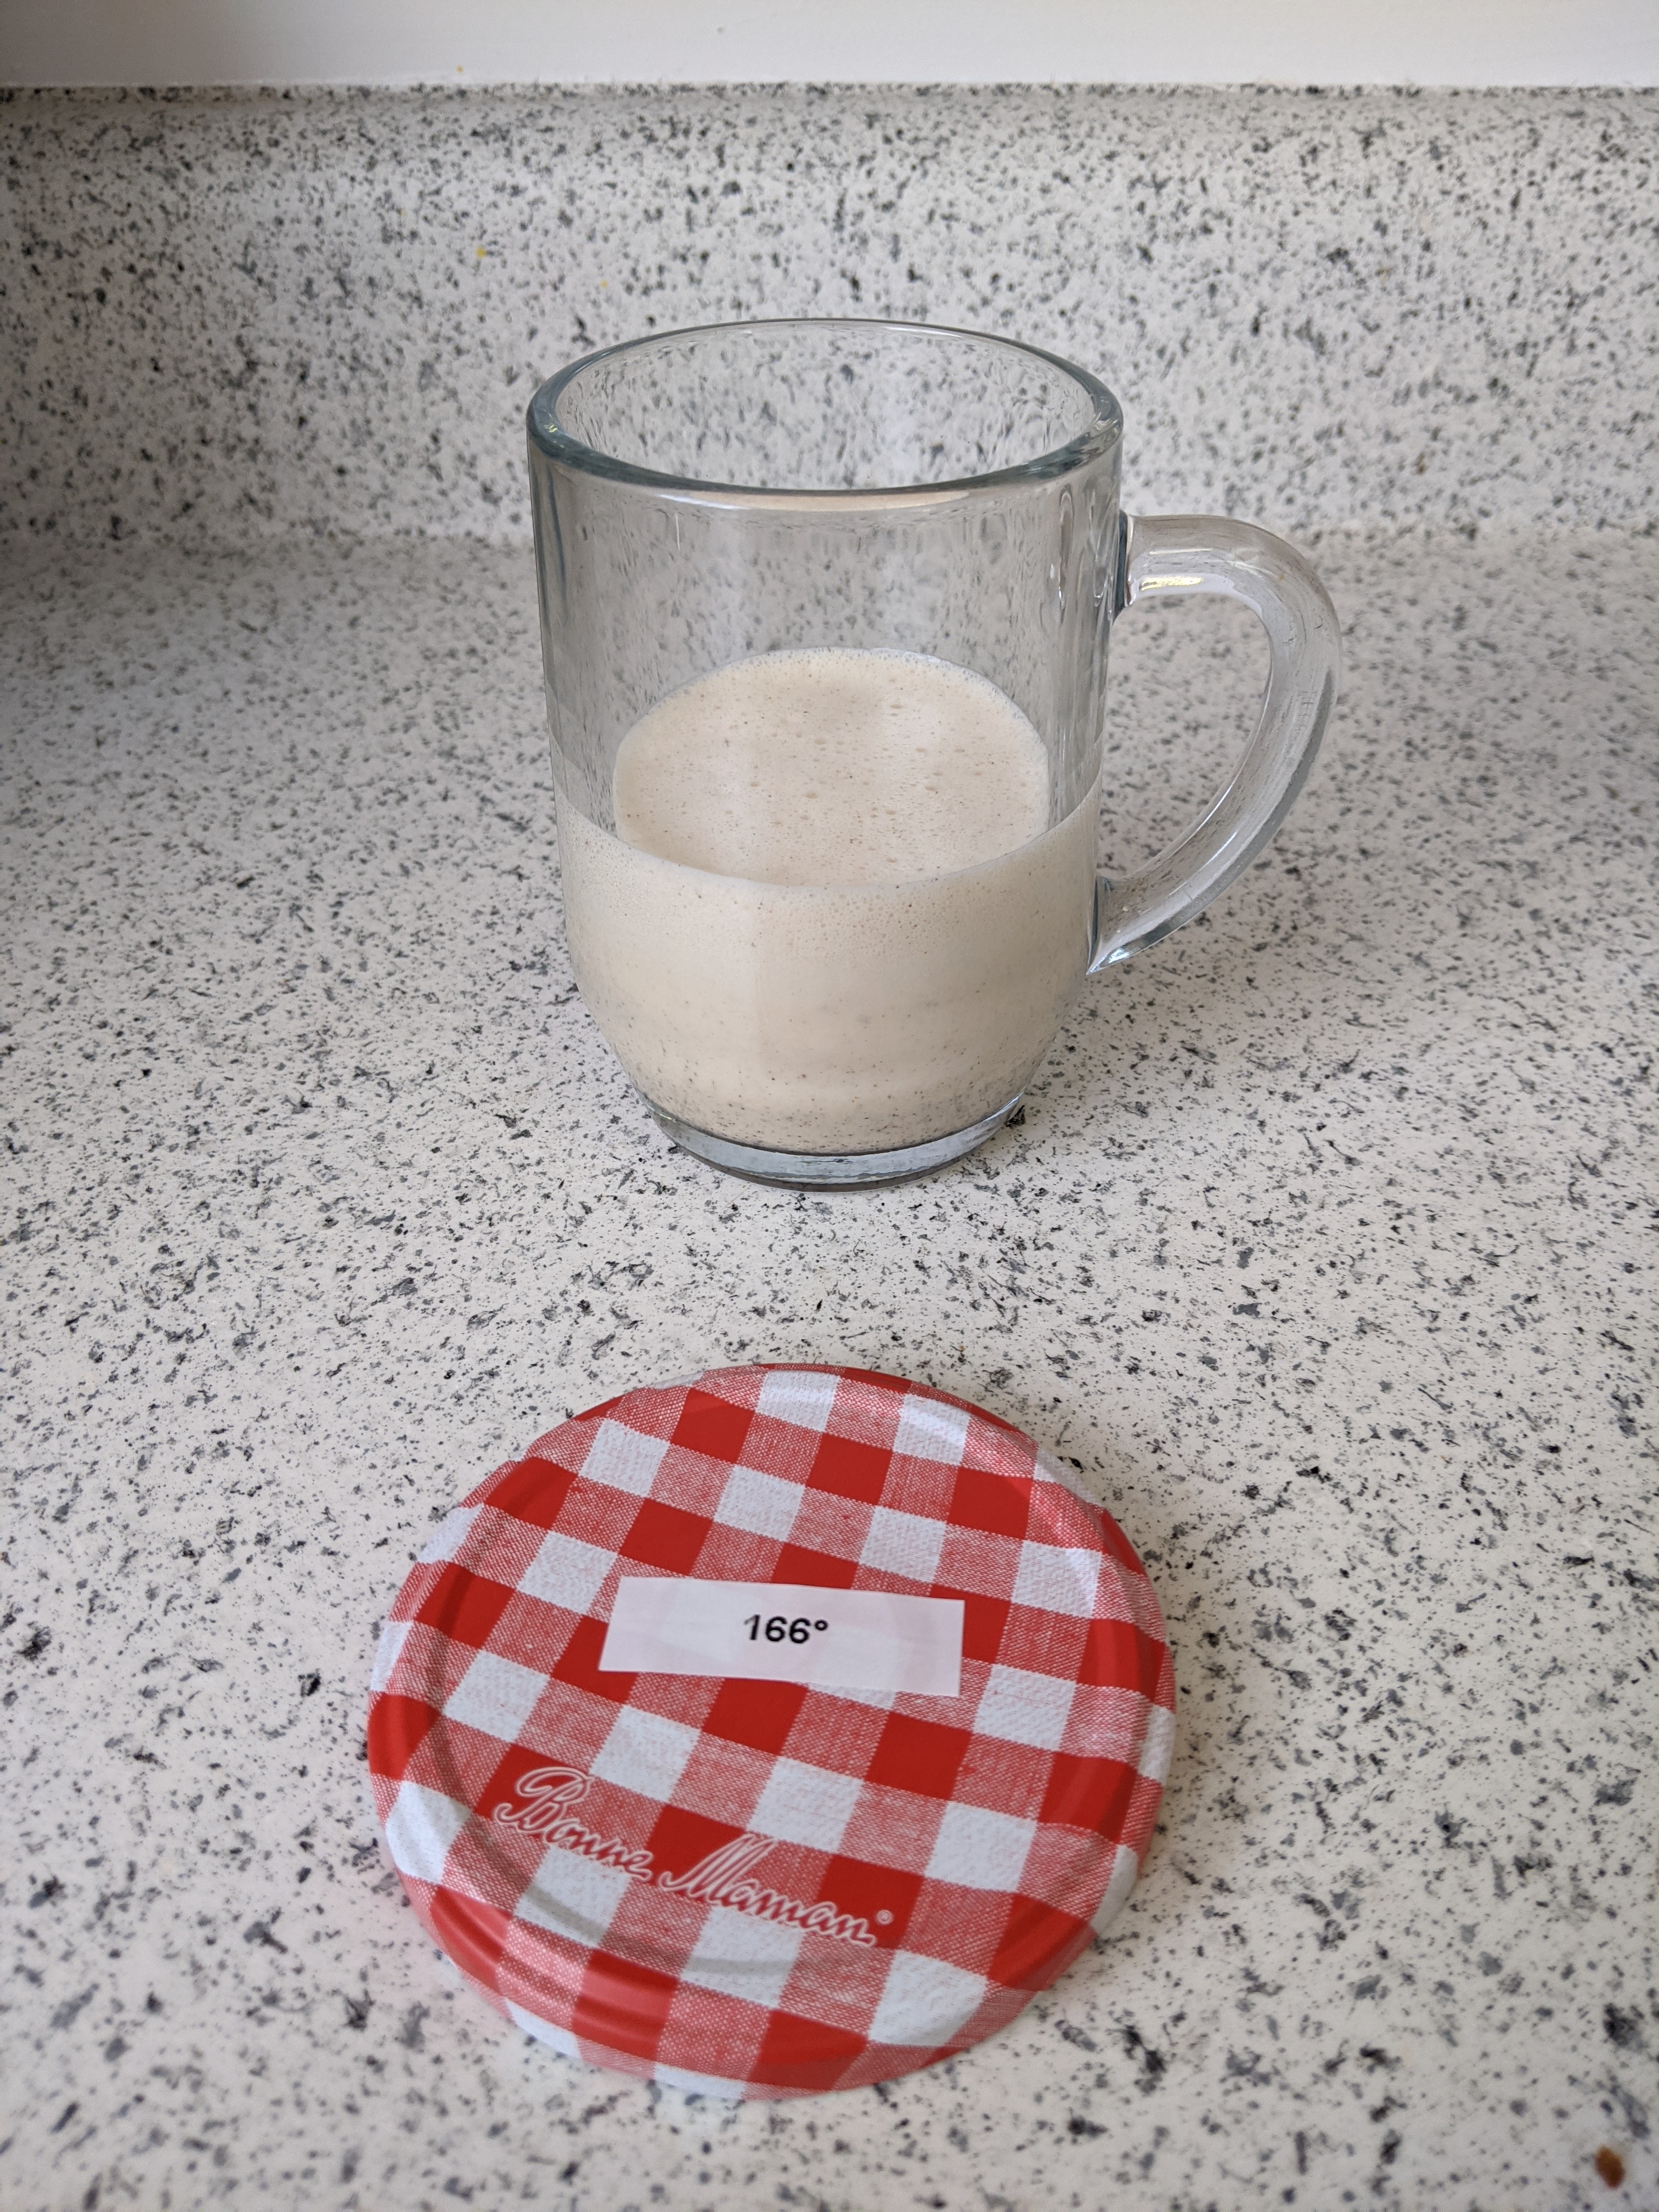
- 166 degrees F: Our baseline. This one was supposed to be 160 degrees (the temperature indicated in all the recipes I’ve seen), but somehow the temperature jumped to 166 before I could take it off the stove and I’m not gonna pretend that didn’t happen.
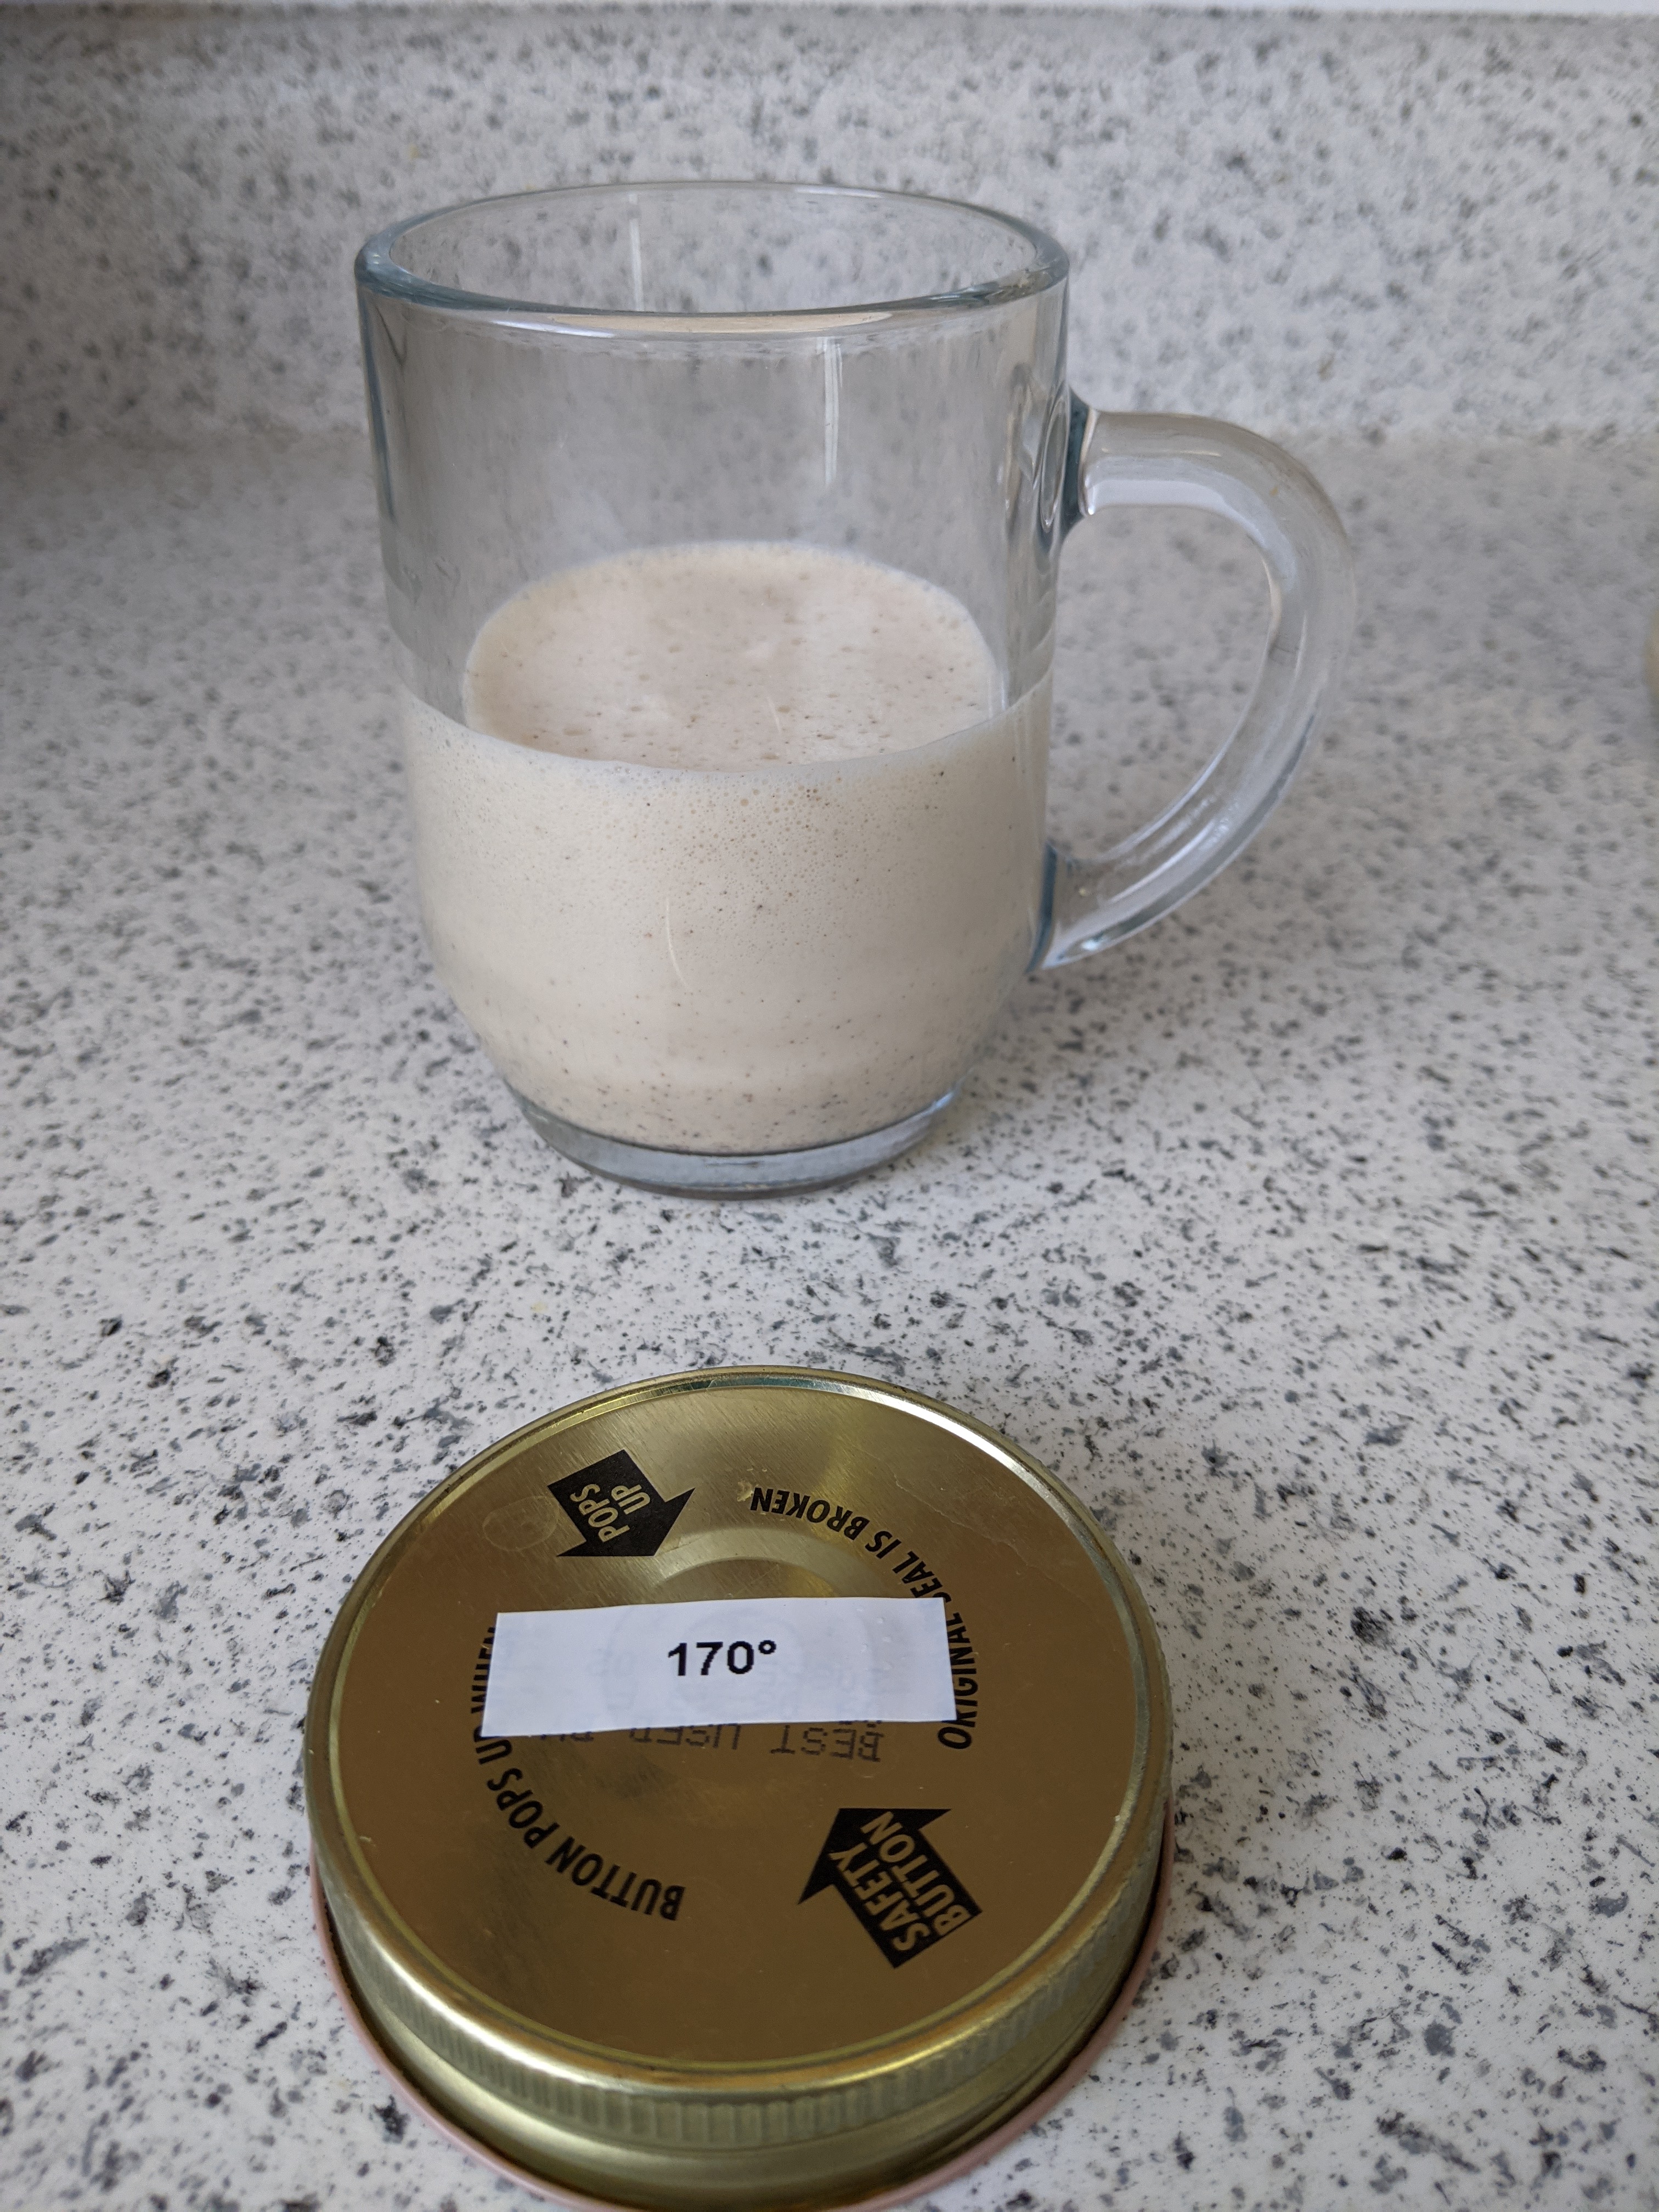
- 170 degrees F
- 180 degrees F
- 190 degrees F
- 200 degrees F
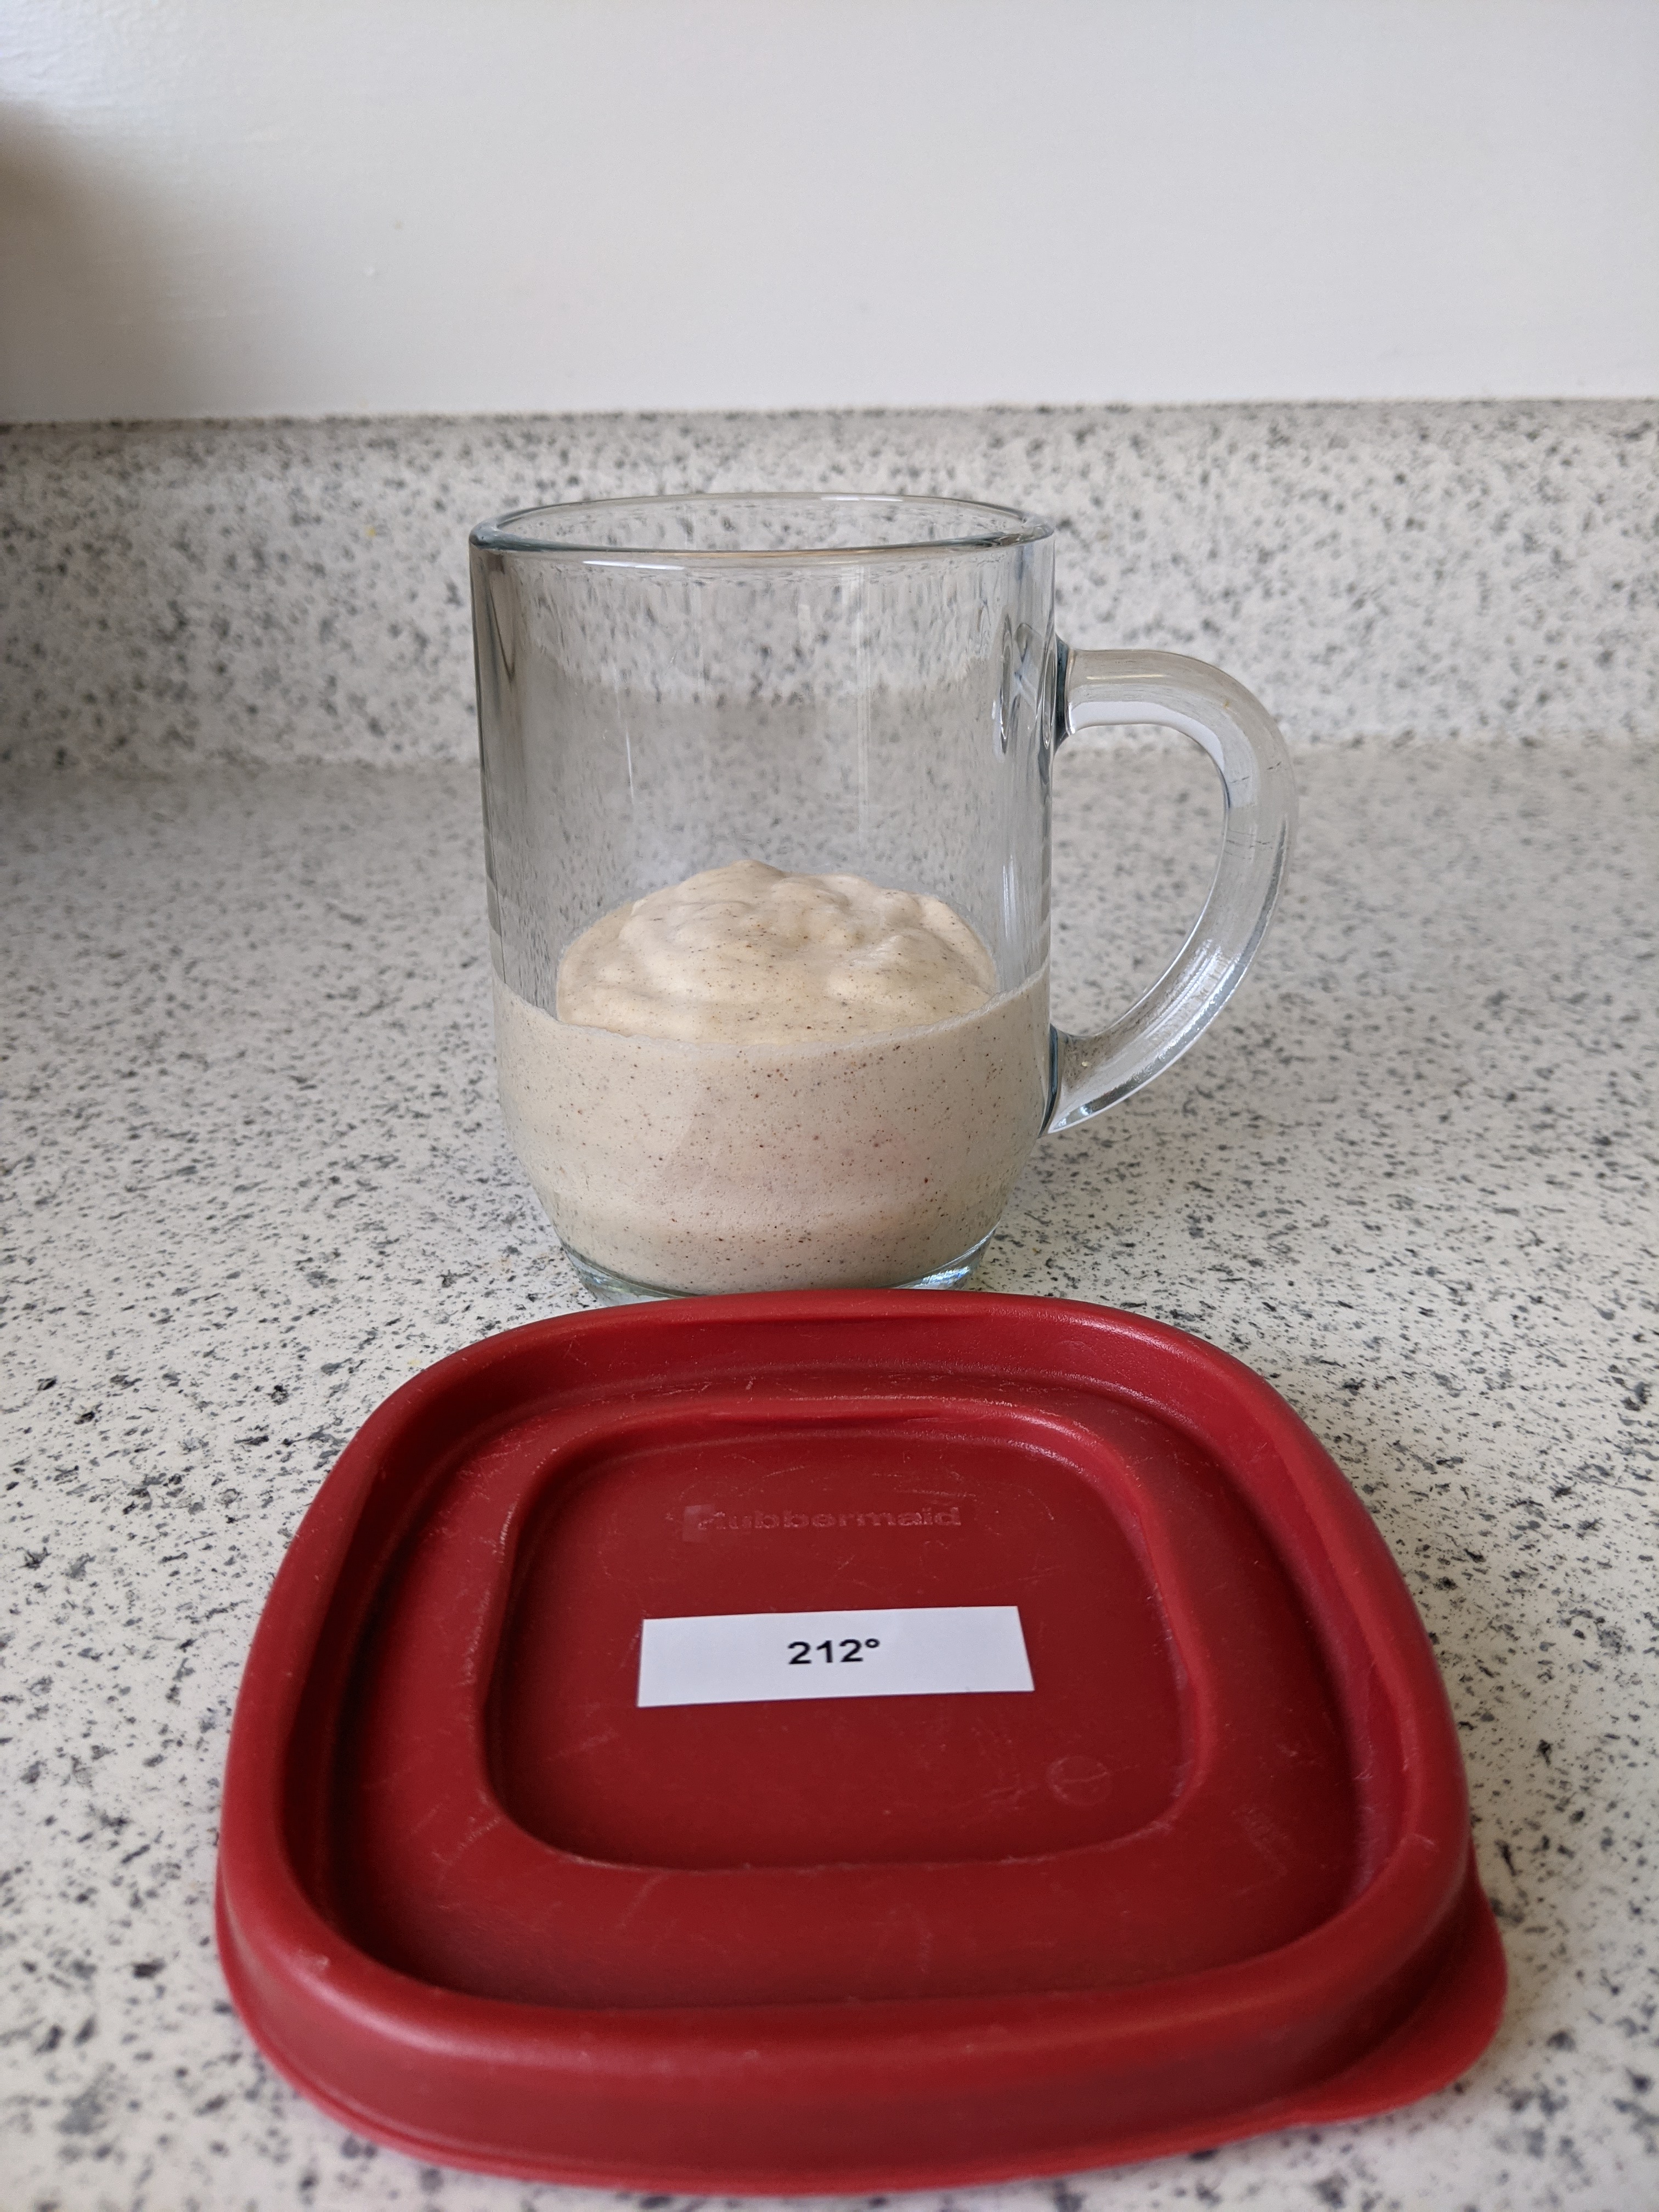
- 212 degrees F: This one was mostly just to see what would happen if I cooked custard to the boiling point. I needed an extreme, so why not?
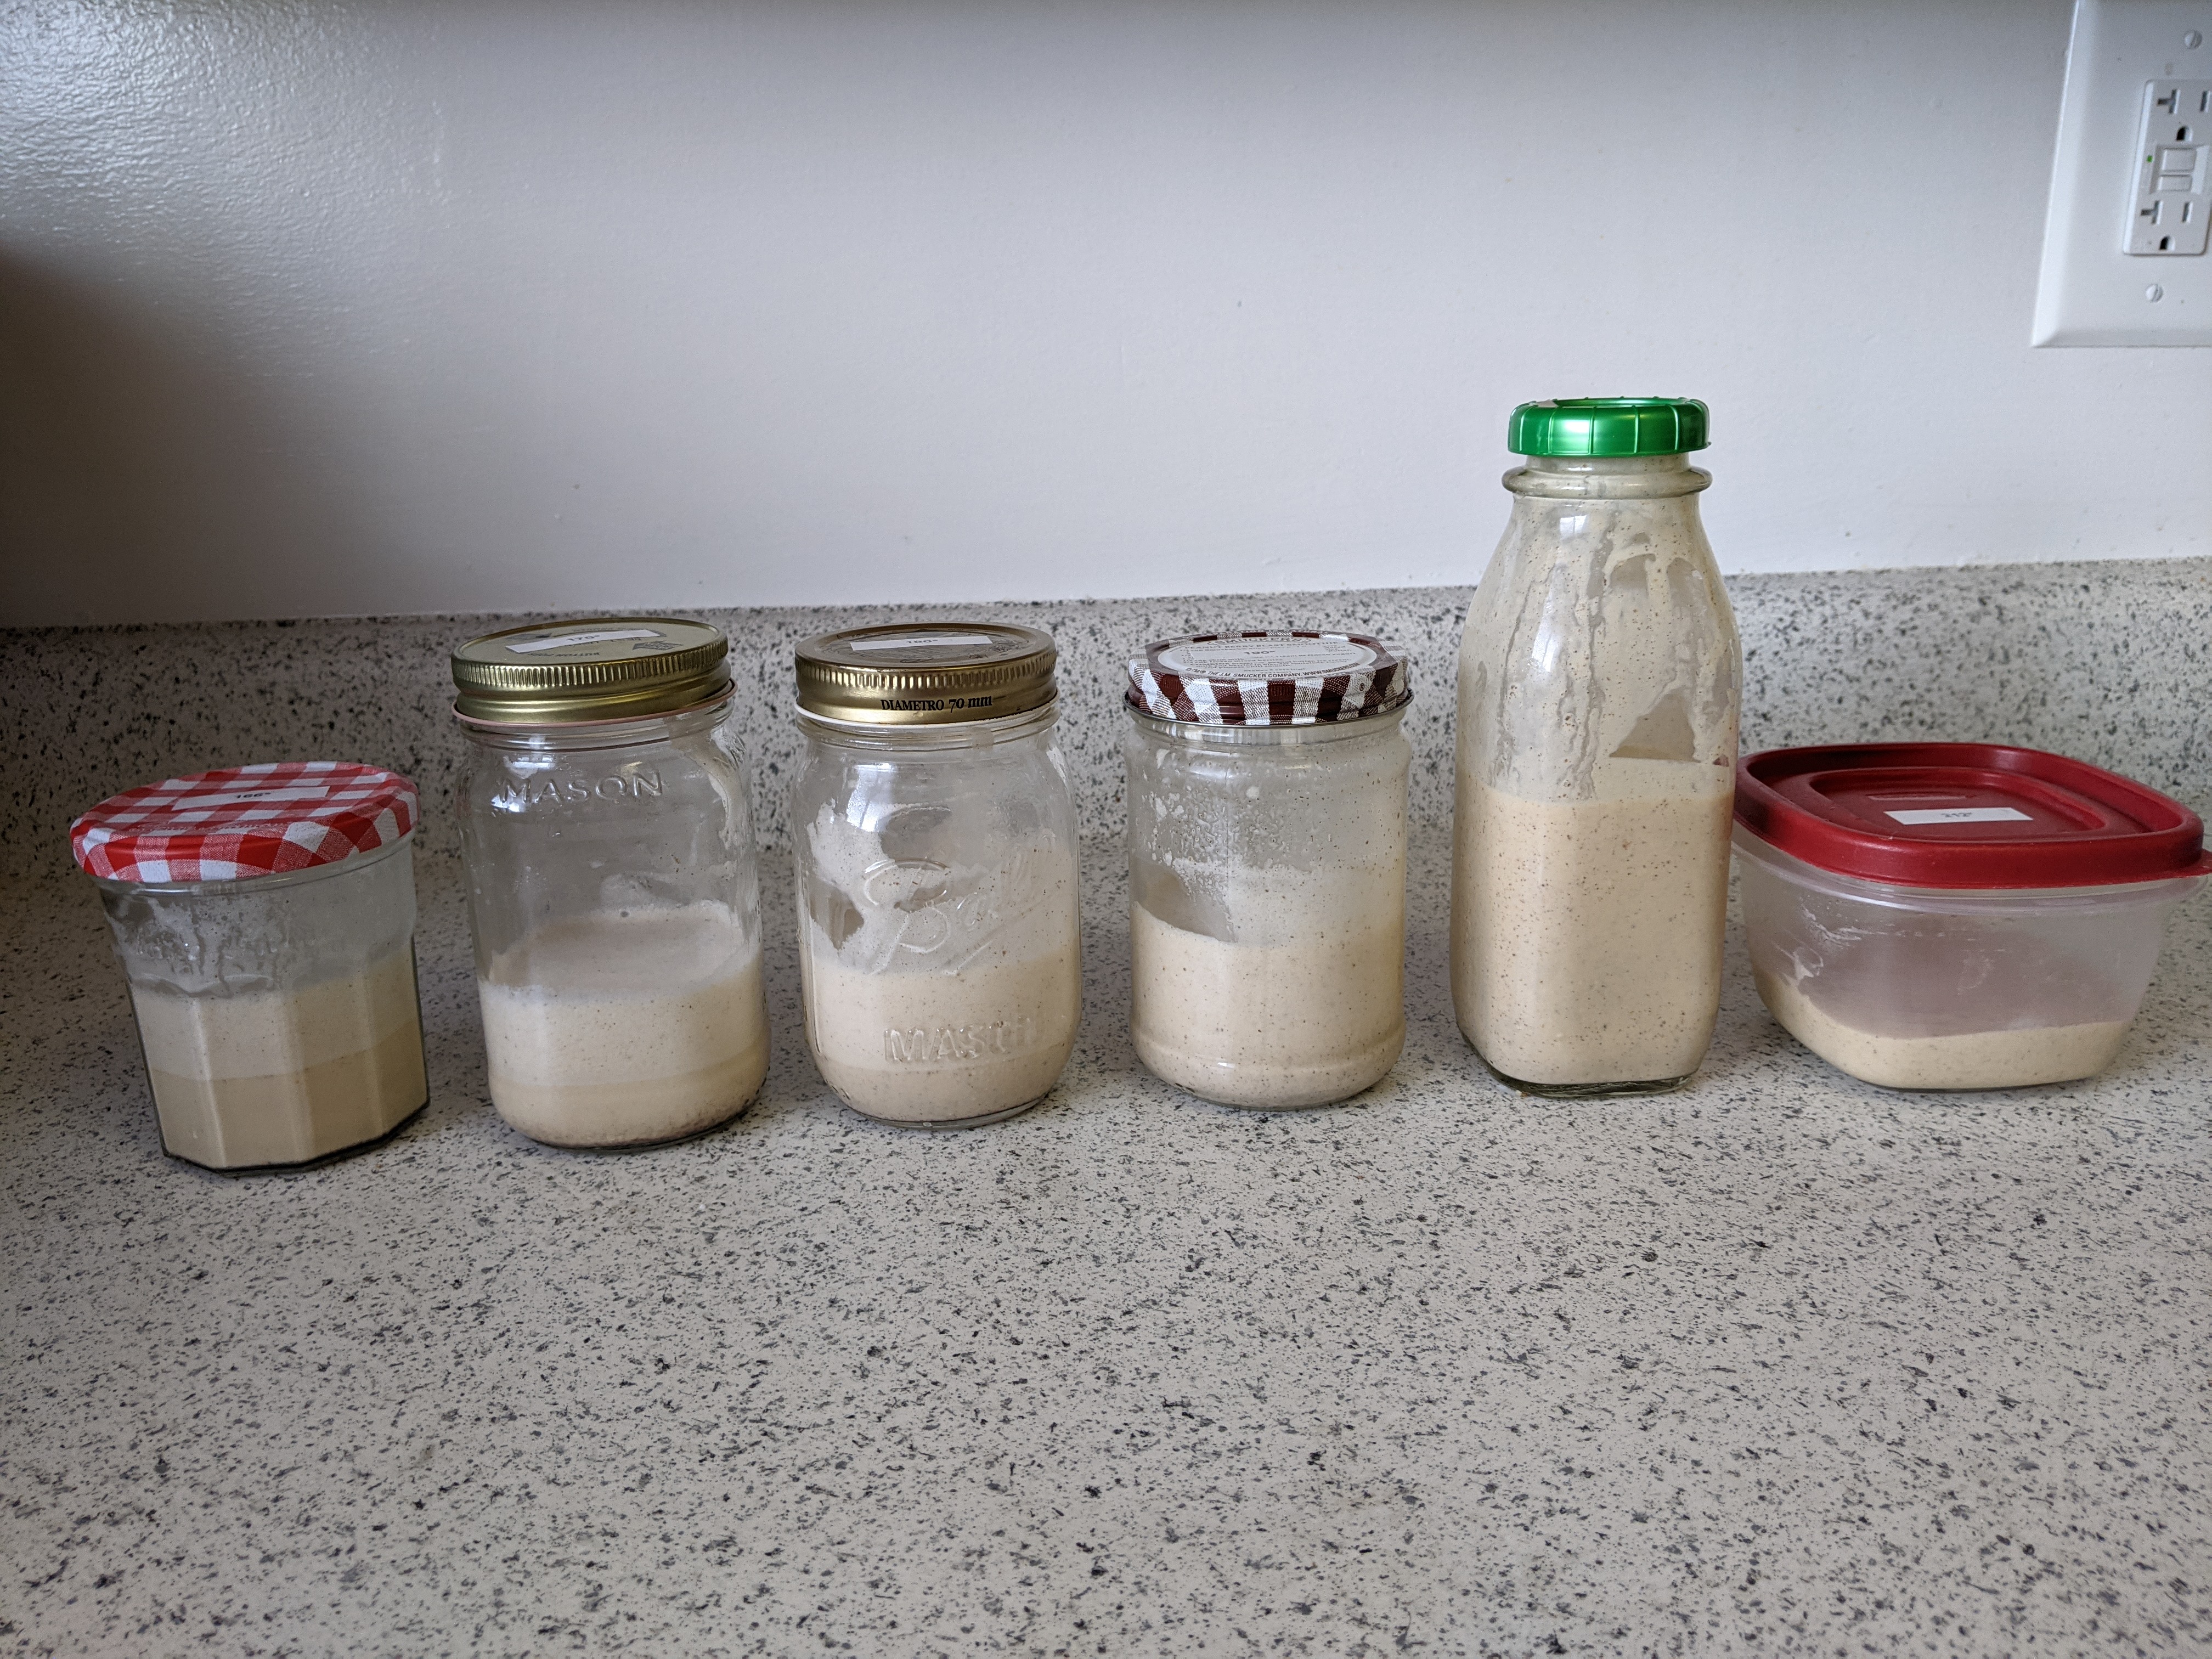
You can split these into two groups, actually, which is more noticeable from the side view below. The 166, 170, and 180-degree batches (the three leftmost in the image below) all have a noticeable line where the frothy egg whites have separated from the custard mixture, floating to the top as light and frothy things are wont to do.
The three batches on the right, however–the 190, 200, and 212-degree batches–have no such line. The egg whites haven’t separated at all. I don’t know the science behind it, but my best unscientific guess is that when the custard mixture is cooked at 190 degrees or higher, it becomes so thick that long after beaten egg whites are folded into it, it’s able to hold the egg whites in place with their… thickness.
I held a taste test with Matt and two friends who had come over for hot chocolate (which I then held hostage until they participated in my eggnog science). Here are our findings:
- 166 degrees: The egg white foam separated from the custard almost instantly, so this was like drinking a thin eggnog with a foamy topping. This was too thin for me.
- 170 degrees: The egg white foam didn’t separate quite as quickly. This was thicker, but still too thin for me. Matt felt the eggnog taste was most apparent in this batch and the 166-degree batch, but I felt all the batches had a good amount of eggnog flavor.
- 180 degrees: This was thicker and foamier than the first two.
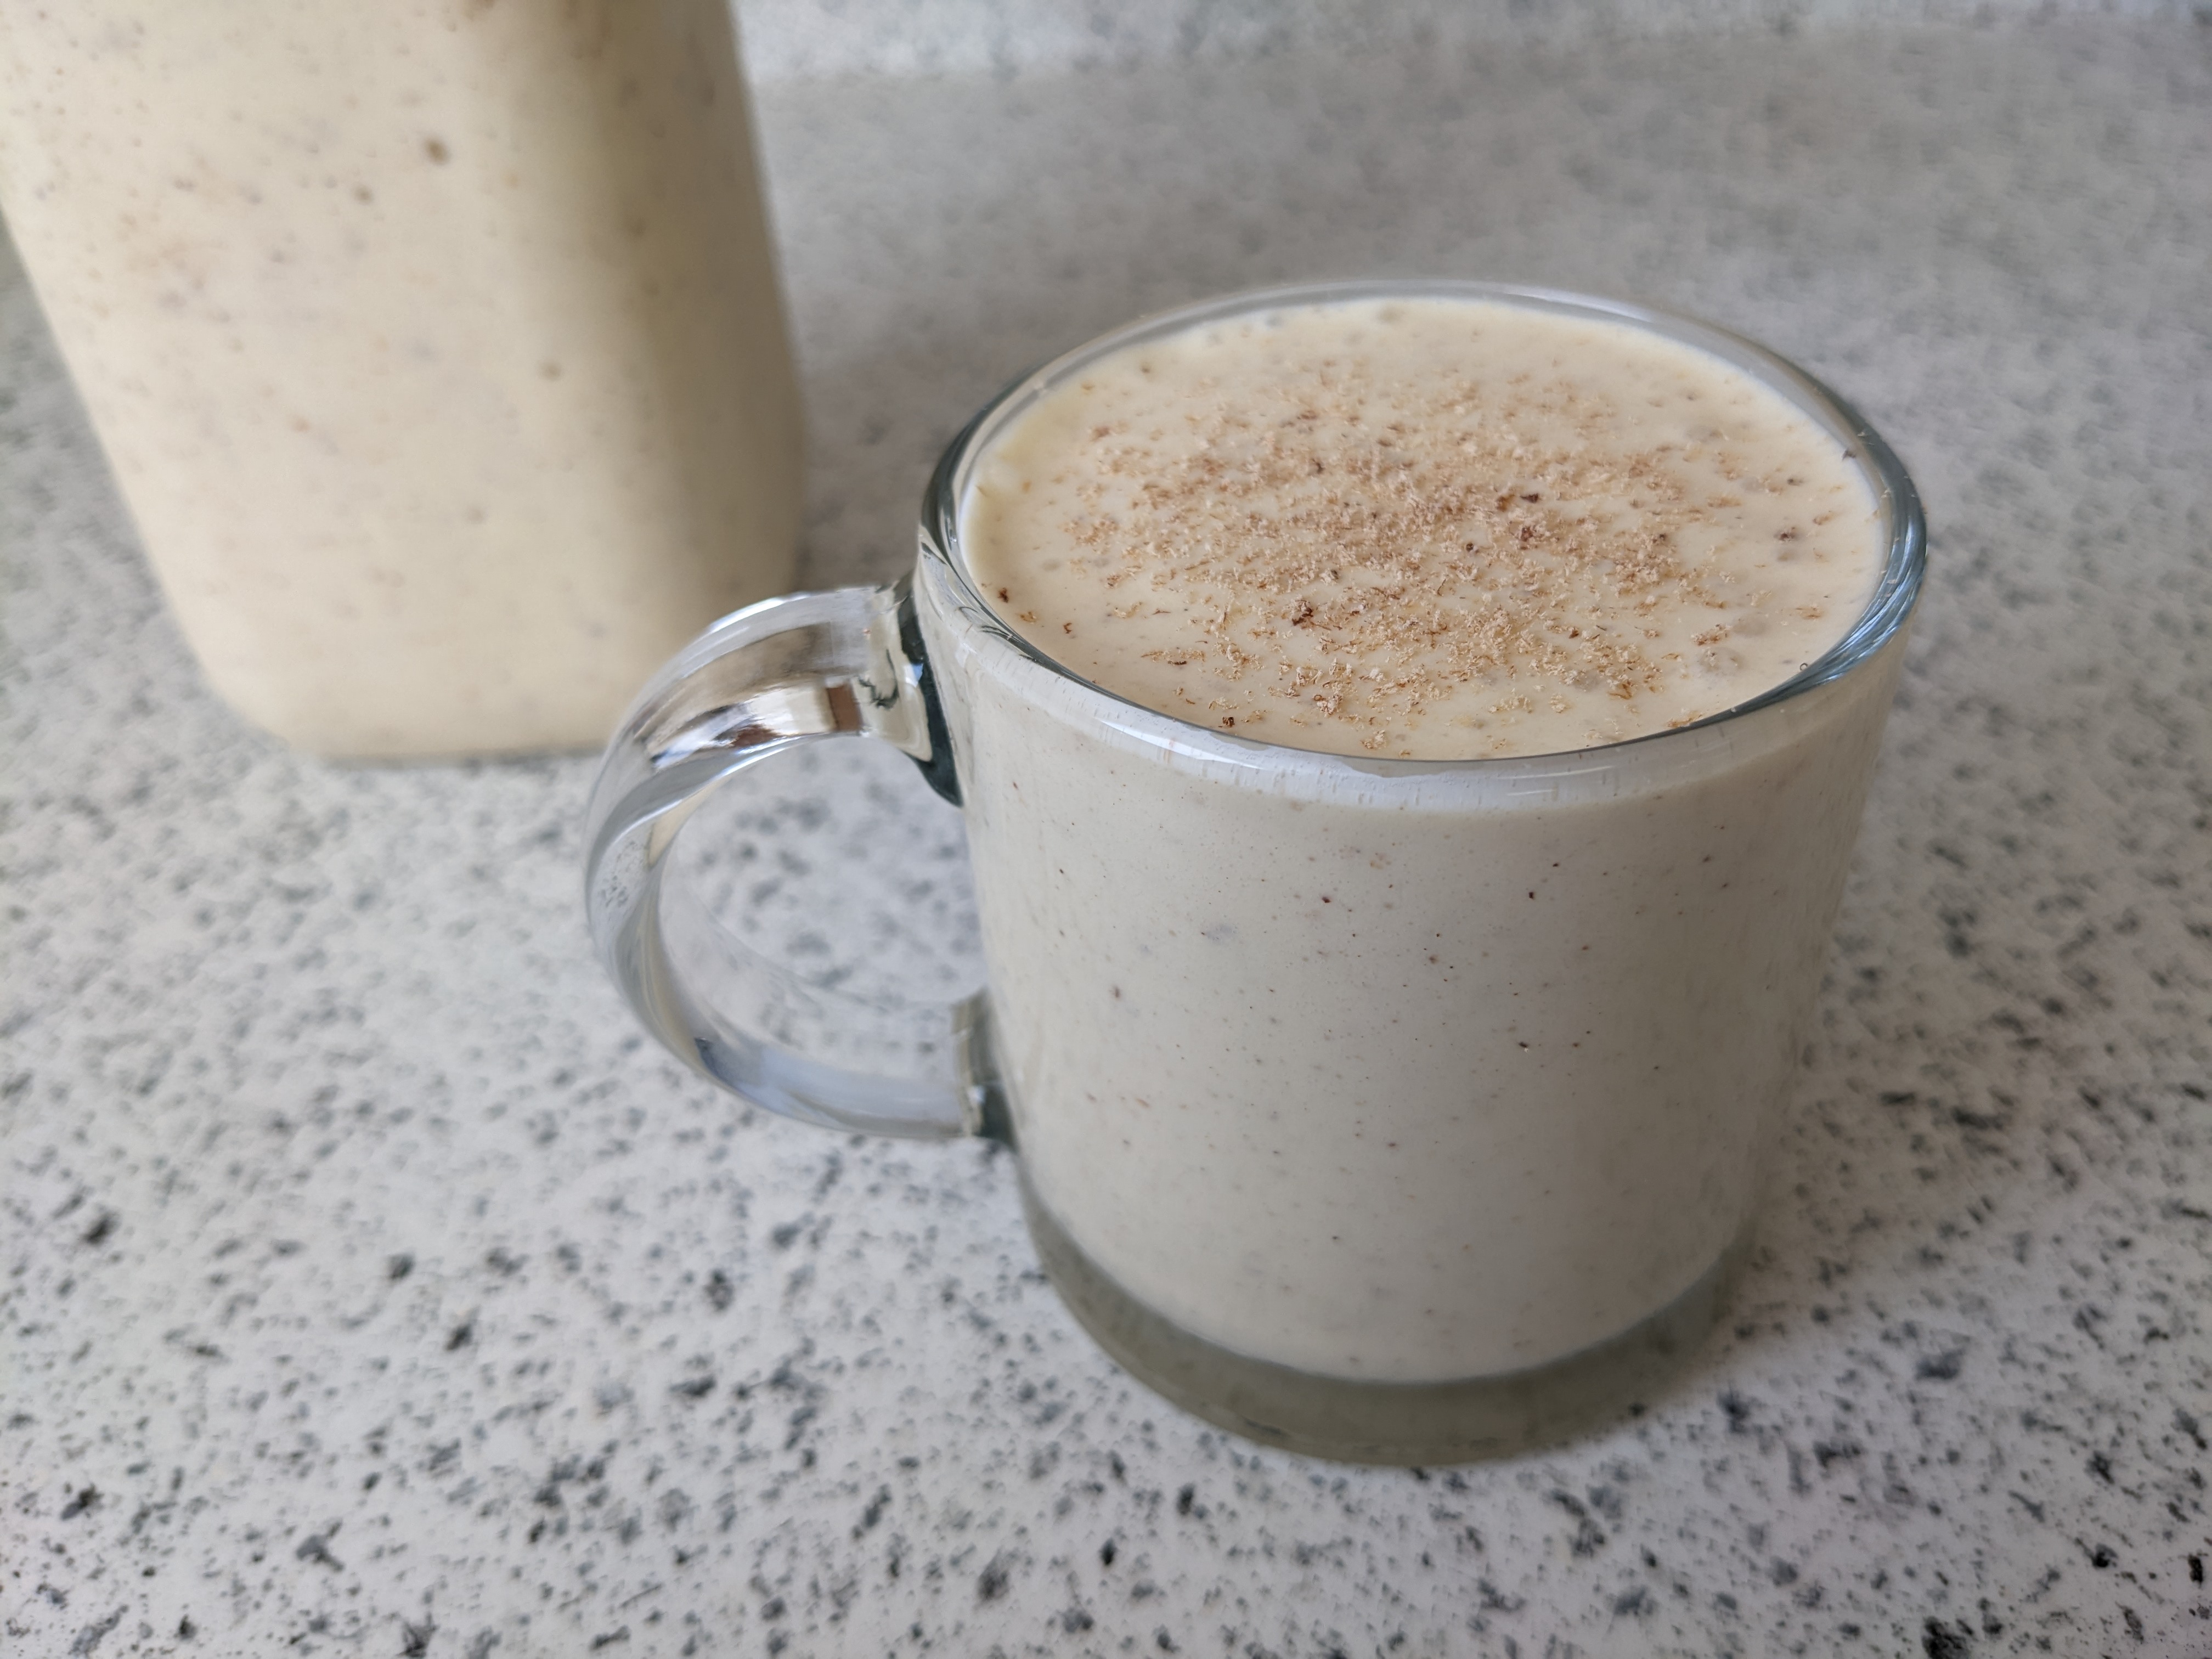
- 190 degrees: This one was my favorite and a favorite for two of my three other taste testers. My notes describe this one as “foamy and like a milkshake.” Matt felt this one had the right consistency.
- 200 degrees: This one was even thicker, to the point of being too thick for me. It also lost some of the egg white frothiness–perhaps the thicker custard actually strangled the egg white foam.
- 212 degrees: This was basically pudding, and it had no egg white frothiness whatsoever.


And so our standout winner was the 190-degree batch! It was milkshake-like in texture while retaining the light, foamy airiness from the egg whites. Thick enough to gently coax the egg white froth into the fold without killing it.
And thus my recipe below is for making this thick, foamy, 190-degree batch of eggnog. But the beauty of this experiment is that even if 190 degrees is too much for you, you’re at least a bit more equipped to decide what temperature is best for your eggnog. Maybe it’s the the 160 degrees touted in most other recipes. Maybe it’s 180 degrees. Maybe it’s 200. The choice is yours! The recipe below works the same way regardless of what temperature you choose. Go forth and happy eggnog-ing!
Perfectly Thick Eggnog
Source: Adapted from Ashlee Marie
Makes just over two quarts of eggnog. This recipe can easily be halved if you prefer to make one quart.
- 8 eggs, separated into whites and yolks
- 1/2 cup sugar
- pinch of salt
- 4 cups whole milk
- 2 cups heavy cream
- 6 tbsp sugar
- 1 tablespoon vanilla
- 2 teaspoons nutmeg (ideally freshly grated)
- 1/2 teaspoon cinnamon (optional)
- 1/2 teaspoon allspice (optional)
- 1/4 teaspoon ginger (optional)
Heat the milk and cream in a saucepan until it’s warm (but not boiling), stirring occasionally. While it’s heating, beat the egg yolks, 1/2 cup sugar, and pinch of salt together until the mixture is pale yellow and ribbony (about four minutes).
Temper the egg yolk mixture by pouring a small amount of the warm milk/cream mixture (about half a cup) into the egg yolk mixture. Stir very quickly while pouring it in to prevent the eggs from scrambling. Repeat this process, adding about half a cup of the milk/cream mixture at a time into the egg yolk mixture and stirring quickly until you’ve added about half of the milk/cream into the egg yolks. (It’s probably unnecessarily cautious to add so much of the milk/cream mixture, but look, we’re already going to be breaking all sorts of rules when we heat the egg mixture to 190 degrees. I’m going to at least be very careful with my eggs until that step.)
Your egg yolk mixture should now be warm, thin, and ready for the stove. Pour all of your egg yolk mixture into the remaining milk/cream mixture still on the stove. Stir constantly, and check the temperature often, until the mixture reaches 190 degrees F (or whatever your desired temperature is).
As soon as it reaches 190 degrees, take the mixture off the heat and let cool. I suppose you could let it cool in the saucepan, but I like to transfer it immediately into my chosen container (glass jars) because I don’t want to take any chances of the temperature reaching higher than 190 degrees.
If you have any doubts about your tempering abilities (for instance, if you’re seeing eggy bits in your mixture), you can pour the mixture into a strainer first to weed out any eggy bits that shouldn’t be there. If it’s well tempered, you shouldn’t be seeing any eggy bits at all.
Cover the mixture and let it cool completely in the fridge. After it has cooled, add the vanilla and spices to the cooled mixture. Then, in a large bowl, whip together the egg whites and 6 tablespoons sugar until the mixture is ribbony (before it reaches the soft peaks stage–you should be able to lift your whisk or mixer and see the egg whites drip back into the bowl in ribbon-like strands).
Add about a cup of the eggnog mixture to the egg whites and stir to combine (we’re trying to make the egg whites more pourable). Then pour the egg white mixture into the eggnog and stir until combined. For best results, refrigerate for at least one hour before drinking so that the flavors meld.
Keep refrigerated and stir (or shake) before pouring.

how long did it take you to complete this recipe from start to finish with the egg whites?
LikeLike
I’d say about two and a half hours if we’re including the time it takes for the mixture to chill before you add the egg whites. Heating up the mixture on the stove takes about 20 minutes, chilling the mixture could take around two hours (or overnight), and then whipping the egg whites and folding them in takes about 10 minutes.
LikeLike
Fantastic!! But I should’ve cut the recipe in half (silly me!)
LikeLike
Next time! I’m glad you liked it!
LikeLike